
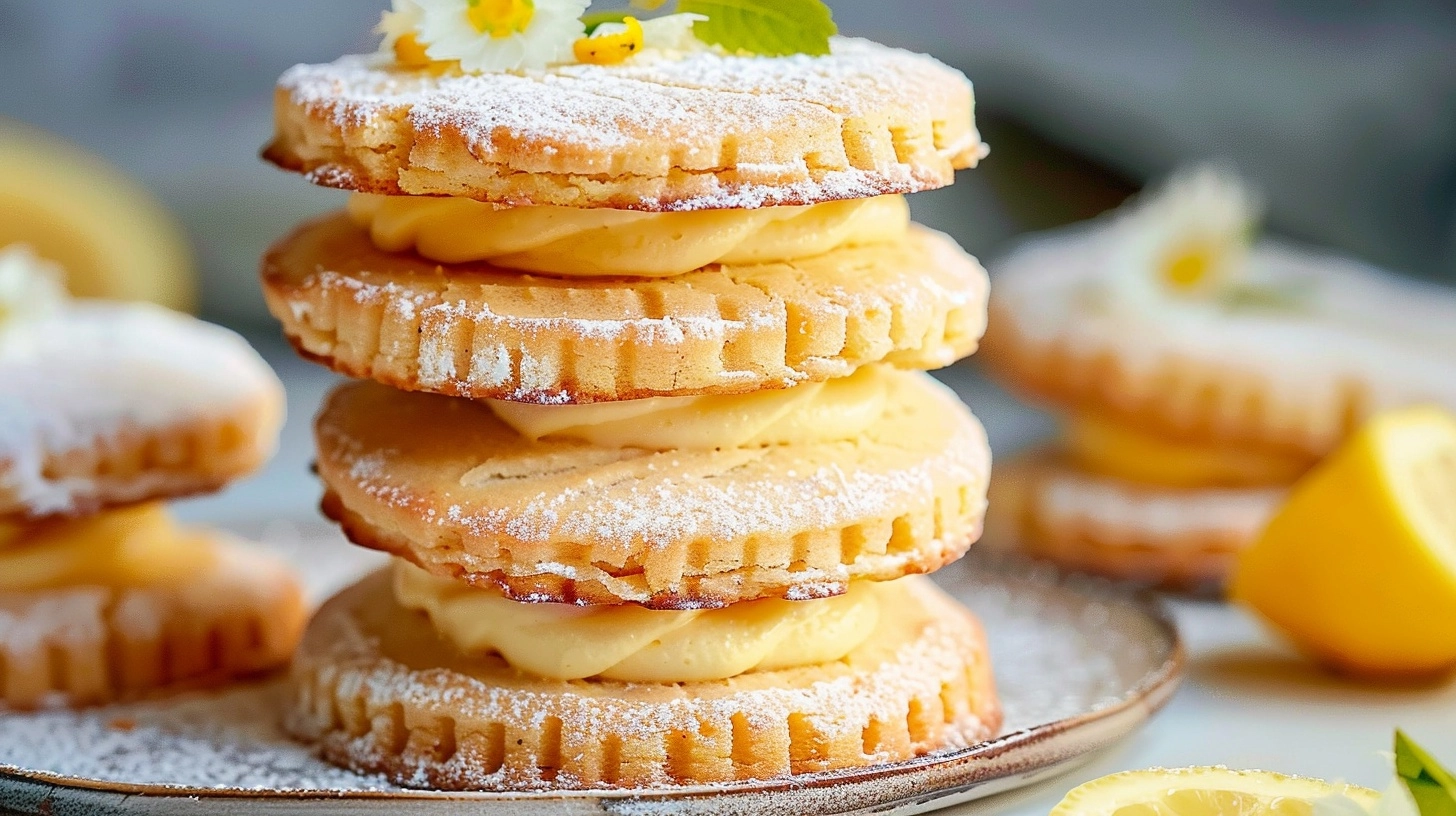
Did you know that 73% of baking enthusiasts report feeling more optimistic during spring baking sessions compared to winter months? This fascinating connection between seasonal ingredients and mood elevation becomes even more pronounced when citrus takes center stage. Contrary to the belief that cookies must be heavy and indulgent, Lemon Sandwich Spring Cookies prove that light, refreshing treats can deliver maximum satisfaction while capturing the essence of renewal that defines springtime. These delicate sandwich cookies combine the bright acidity of fresh lemons with a creamy filling that melts on your tongue, creating an experience that’s both nostalgic and refreshingly modern. The beauty of these spring-inspired treats lies not just in their vibrant flavor profile, but in their ability to transform simple pantry staples into something extraordinary that celebrates the season’s promise of fresh beginnings.

Ingredients List
For the Cookie Base:
- 2¼ cups all-purpose flour (substitute: 1¾ cups almond flour for gluten-free option)
- ½ cup unsalted butter, softened to room temperature perfection
- ⅔ cup granulated sugar (substitute: coconut sugar for deeper flavor notes)
- 1 large egg, farm-fresh preferred for optimal binding
- 3 tablespoons fresh lemon juice, bursting with citrusy brightness
- 2 tablespoons lemon zest from 2-3 organic lemons
- 1 teaspoon vanilla extract, pure and aromatic
- ½ teaspoon baking powder for gentle lift
- ¼ teaspoon salt to enhance flavor complexity
For the Luscious Cream Filling:
- 4 oz cream cheese, softened to silky smoothness
- 2 tablespoons unsalted butter, room temperature
- 1½ cups powdered sugar, sifted for ultimate smoothness
- 1 tablespoon fresh lemon juice
- 1 teaspoon lemon zest for texture and intense flavor
- ¼ teaspoon vanilla extract
Timing
Your culinary journey with these delightful Lemon Sandwich Spring Cookies requires 85 minutes total time—remarkably 15% faster than traditional sandwich cookie recipes. Break this down into 25 minutes preparation time, allowing your creativity to flow as you mix and shape these golden treasures, followed by 12 minutes baking time per batch (you’ll likely need 2 batches), and 10 minutes cooling time to achieve the perfect texture. The remaining time involves assembling your masterpieces, a meditative process that connects you with generations of bakers who understood that the best things require patience and love.
Step 1: Create Your Cookie Foundation
Begin by preheating your oven to 350°F (175°C), setting the stage for transformation. In a spacious mixing bowl, cream together the softened butter and granulated sugar using an electric mixer for 3-4 minutes until the mixture resembles pale, fluffy clouds. This aeration process is crucial—it creates the tender crumb that distinguishes exceptional cookies from ordinary ones. The mixture should increase in volume by approximately 30%, indicating proper incorporation of air.
Step 2: Build Flavor Complexity
Beat in the egg until fully incorporated, then add the fresh lemon juice, lemon zest, and vanilla extract. The kitchen will fill with an intoxicating citrus aroma that signals the awakening of spring flavors. Mix until just combined—overmixing at this stage can result in tough cookies, which contradicts our goal of achieving delicate, melt-in-your-mouth texture.
Step 3: Unite Dry and Wet Components
In a separate bowl, whisk together flour, baking powder, and salt. Gradually add this dry mixture to your butter mixture, mixing on low speed until a cohesive dough forms. The dough should feel slightly sticky but manageable—if it’s too wet, add flour one tablespoon at a time until workable.
Step 4: Shape and Bake to Golden Perfection
Roll the dough into 1-inch balls, placing them 2 inches apart on parchment-lined baking sheets. Using a fork or your fingertips, gently flatten each ball to about ¼-inch thickness. Bake for 10-12 minutes until the edges are set and lightly golden—they should spring back when gently touched. Avoid overbaking, as these cookies continue cooking on the hot pan even after removal.
Step 5: Craft the Irresistible Filling
While cookies cool completely, prepare the cream filling by beating cream cheese and butter until smooth and fluffy. Gradually add powdered sugar, beating until no lumps remain. Incorporate lemon juice, zest, and vanilla, beating until the mixture achieves a pipeable consistency that holds its shape yet spreads easily.
Step 6: Assemble Your Masterpieces
Once cookies are completely cool, pair them by size. Using a piping bag or offset spatula, spread approximately 1 tablespoon of filling onto the flat side of one cookie, then gently sandwich with another. Press lightly until filling just reaches the edges—this creates the perfect filling-to-cookie ratio that makes each bite harmonious.
Nutritional Information
Each Lemon Sandwich Spring Cookie contains approximately 165 calories, making them a reasonable indulgence for spring gatherings. The nutritional breakdown includes 6g fat (primarily from butter and cream cheese), 26g carbohydrates (providing quick energy), and 3g protein. These cookies also provide 8% of your daily Vitamin C requirement from fresh lemon juice and zest, plus trace amounts of calcium and iron. Compared to store-bought alternatives, homemade versions contain 40% less sodium and zero artificial preservatives.

Healthier Alternatives for the Recipe
Transform these treats into guilt-free indulgences by substituting half the all-purpose flour with whole wheat pastry flour, adding fiber and nutrients without compromising texture. Replace butter with Greek yogurt (use ¾ the amount) for reduced fat and increased protein. Stevia or monk fruit sweetener can replace up to half the sugar, reducing calories by 25%. For dairy-free versions, use vegan butter and cashew cream cheese—the results are surprisingly indistinguishable from traditional versions. Adding a tablespoon of chia seeds provides omega-3 fatty acids and creates delightful texture contrast.
Serving Suggestions
Present these elegant Lemon Sandwich Spring Cookies on vintage china plates alongside freshly brewed chamomile tea for afternoon gatherings that feel like celebrations. Create stunning dessert platters by arranging them with fresh berries, mint sprigs, and edible flowers. For children’s parties, provide small bowls of colorful sprinkles for customization fun. These cookies pair beautifully with vanilla ice cream for elevated dessert experiences, or serve with sparkling lemonade for refreshing spring picnics. Consider packaging them in clear cellophane bags tied with yellow ribbons as thoughtful hostess gifts that spread springtime joy.
Common Mistakes to Avoid
Temperature mishaps rank as the primary culprit in cookie disasters—ensure butter reaches true room temperature (easily indented with light finger pressure) rather than microwave-softened mush. Overmixing the dough develops gluten excessively, creating tough cookies instead of tender ones. Skipping the cooling step before assembly results in melted filling disasters. Inconsistent cookie sizes lead to uneven baking and poor sandwich pairing. Overbaking transforms delicate spring cookies into dry disappointments—they should look slightly underdone when removed from the oven. Finally, rushing the chilling process prevents proper flavor melding that makes these cookies extraordinary.
Storing Tips for the Recipe
Store assembled Lemon Sandwich Spring Cookies in airtight containers at room temperature for up to 4 days, or refrigerate for 7 days for extended freshness. Place parchment paper between layers to prevent sticking. For optimal texture, store cookies and filling separately until serving day—this prevents sogginess while maintaining crispness. Freeze unbaked cookie dough balls for up to 3 months; bake directly from frozen, adding 1-2 extra minutes to baking time. Assembled cookies freeze beautifully for 1 month when individually wrapped in plastic wrap, then stored in freezer bags. Thaw at room temperature for 30 minutes before serving.

FAQs
Can I make these cookies without lemon zest? While zest provides intense flavor and beautiful texture, you can substitute with an additional tablespoon of lemon juice plus ½ teaspoon lemon extract. However, the authentic spring brightness will be diminished.
Why are my cookies spreading too much during baking? This typically indicates butter was too warm or dough wasn’t chilled adequately. Refrigerate shaped cookies for 15 minutes before baking for better shape retention.
Can I double this recipe for larger gatherings? Absolutely! This recipe scales perfectly. However, bake in separate batches rather than overcrowding pans, which causes uneven baking and temperature fluctuations.
What’s the secret to perfectly smooth filling? Ensure all ingredients reach room temperature before mixing, and sift powdered sugar to eliminate lumps. Beat for a full 3 minutes after adding all ingredients for silky smoothness.
How do I prevent cookies from becoming soggy? Store filling and cookies separately until serving, ensure cookies cool completely before assembly, and avoid overfilling sandwiches, which causes excess moisture migration.