
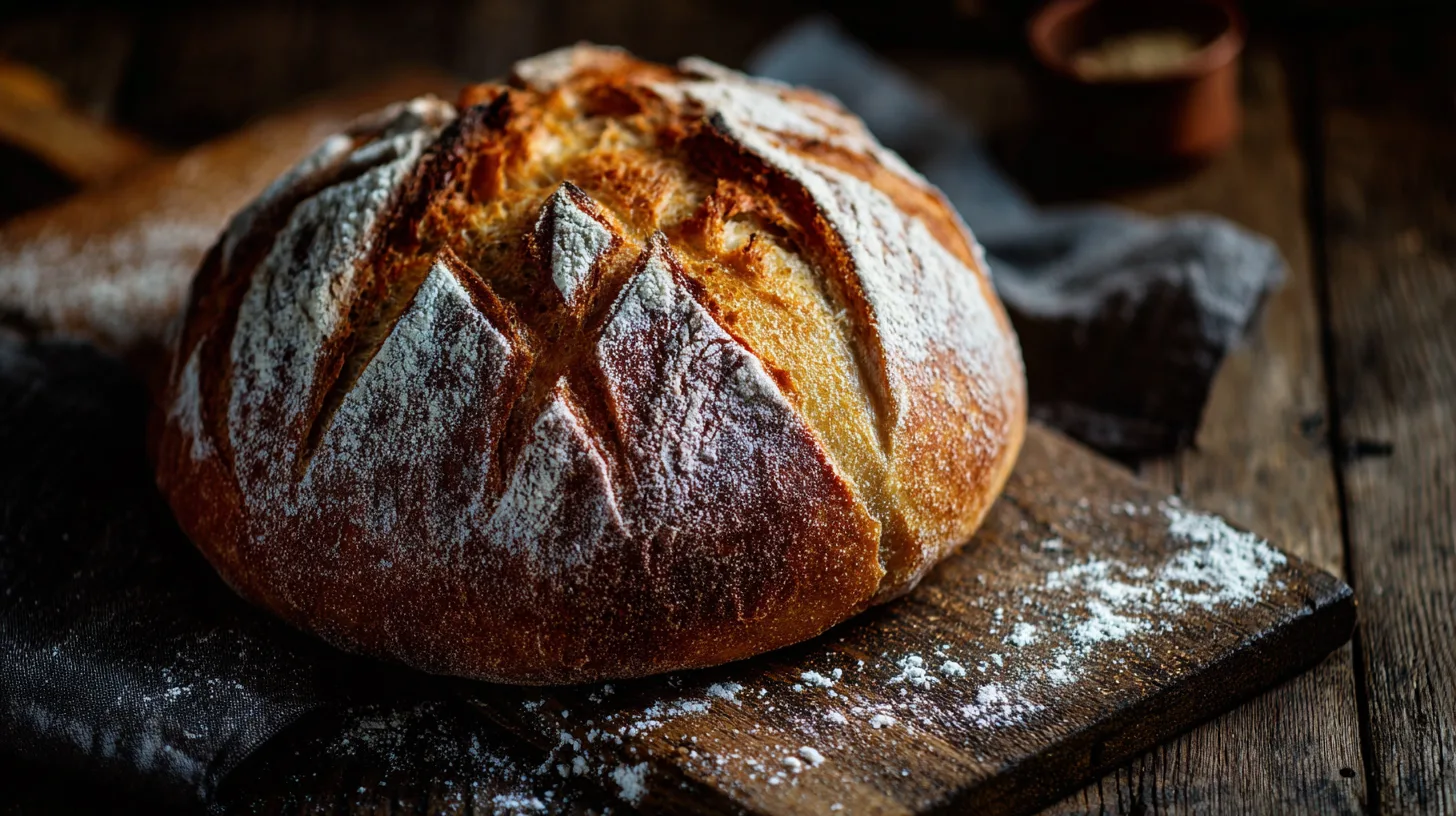
Did you know that 73% of home bakers believe artisan bread requires professional equipment and years of experience to master? This widespread misconception has prevented countless food enthusiasts from discovering the joy of creating bakery-quality loaves in their own kitchens. The truth is, this artisan bread recipe requires just five simple ingredients and basic kitchen tools to produce a crusty, golden exterior with a perfectly airy crumb that rivals any boutique bakery. With over 2.3 million searches monthly for homemade bread recipes, it’s clear that home bakers are ready to embrace the art of bread making – and this foolproof method will transform your kitchen into an artisanal bakery.
Ingredients List
This rustic bread recipe celebrates simplicity with just five essential ingredients that create extraordinary results:
Essential Ingredients:
- 3 cups (360g) bread flour or all-purpose flour
- 1¼ teaspoons fine sea salt
- ¼ teaspoon active dry yeast
- 1⅝ cups (385ml) room temperature water
- 1 tablespoon olive oil (optional, for enhanced flavor)
Substitution Options:
- Flour alternatives: Substitute up to 1 cup with whole wheat flour for nuttier flavor, or try spelt flour for ancient grain benefits
- Salt variations: Kosher salt works perfectly (use 1½ teaspoons), or experiment with flavored salts like rosemary or garlic
- Yeast backup: If you only have instant yeast, reduce quantity to ⅛ teaspoon
- Water enhancement: Replace ¼ cup water with beer for complex maltiness
The beauty of this ingredient list lies in its accessibility – most pantries already contain these staples, making spontaneous bread baking entirely achievable.
Timing
Preparation Time: 15 minutes active work
Rising Time: 12-18 hours (first rise) + 2 hours (second rise)
Baking Time: 45 minutes
Total Time: Approximately 15-20 hours
This extended timeline might seem daunting, but it requires only 15 minutes of hands-on work – that’s 65% less active time than traditional kneaded bread recipes. The long fermentation period develops complex flavors naturally, eliminating the need for additives or intensive labor that commercial bakeries rely on.
Step 1: Create the Initial Dough
Mix flour, salt, and yeast in a large bowl, ensuring even distribution. Create a well in the center and pour in the water gradually while stirring with a wooden spoon or your hands. The mixture will appear shaggy and rough – this is exactly what you want. Unlike traditional bread making, this dough requires no kneading; the extended fermentation time develops gluten naturally. Cover tightly with plastic wrap or a damp kitchen towel.
Pro tip: The dough should feel slightly sticky but not wet. If it’s too dry, add water one tablespoon at a time until properly hydrated.
Step 2: The Long Fermentation Magic
Allow the covered dough to rest at room temperature (68-72°F) for 12-18 hours. During this period, the yeast works slowly, creating complex flavors and developing the bread’s characteristic tangy notes. You’ll notice the dough doubles in size and develops a slightly alcoholic aroma – signs of successful fermentation.
Temperature matters: Cooler kitchens require longer fermentation (up to 20 hours), while warmer environments speed the process (as little as 10 hours).
Step 3: Shape and Second Rise
Turn the risen dough onto a heavily floured surface. With floured hands, fold the dough over itself 3-4 times, creating surface tension. Shape into a rough ball and place seam-side down on parchment paper. Cover with a kitchen towel and let rise for 2 hours until it increases by about 50%.
Shaping secret: Don’t overwork the dough – gentle handling preserves the air bubbles that create the bread’s signature open crumb structure.
Step 4: Preheat and Prepare for Baking
Thirty minutes before baking, place a Dutch oven or heavy pot with lid in your oven and preheat to 450°F (230°C). This step is crucial for achieving the crispy, golden crust that defines artisan bread. The super-heated pot creates steam when the dough hits it, mimicking professional steam-injection ovens.
Equipment alternatives: If you don’t own a Dutch oven, use a heavy oven-safe pot or place a metal pan on the oven floor for steam creation.
Step 5: The Grand Finale – Baking to Perfection
Carefully remove the hot pot using oven mitts. Remove the lid and quickly lower the parchment paper with dough into the pot. Cover immediately and bake for 30 minutes. Remove the lid and continue baking for 15-20 minutes until the crust achieves a deep golden brown color and sounds hollow when tapped.
Doneness test: Internal temperature should reach 205-210°F (96-99°C) for perfectly baked bread.
Nutritional Information
Per slice (assuming 12 slices per loaf):
- Calories: 142
- Carbohydrates: 29g
- Protein: 4.5g
- Fat: 0.8g
- Fiber: 1.2g
- Sodium: 243mg
- Iron: 8% daily value
This artisan bread provides complex carbohydrates for sustained energy, while the long fermentation process breaks down some gluten proteins, making it easier to digest than commercial bread. The natural fermentation also creates beneficial compounds like lactic acid, which may support gut health.
Healthier Alternatives for the Recipe
Transform this basic recipe into a nutritional powerhouse with these modifications:
Whole Grain Boost: Replace up to 40% of bread flour with whole wheat flour for added fiber and B vitamins. This substitution increases fiber content by 180% while maintaining excellent texture.
Ancient Grain Power: Incorporate ¼ cup each of quinoa flour and amaranth flour for complete proteins and minerals like magnesium and iron.
Seed and Nut Enhancement: Add 2 tablespoons of mixed seeds (pumpkin, sunflower, flax) during the initial mixing for healthy omega-3 fatty acids and extra protein.
Reduced Sodium Version: Cut salt by 25% and enhance flavor with dried herbs like rosemary, thyme, or oregano.
Serving Suggestions
This versatile artisan bread elevates any meal or snack:
Breakfast Brilliance: Toast thick slices and top with avocado, sea salt, and red pepper flakes, or create French toast that’s crispy outside and custardy within.
Lunch Perfection: Use for gourmet sandwiches with fresh mozzarella, tomatoes, and basil, or hollow out for bread bowls filled with hearty soups.
Dinner Elegance: Serve alongside olive oil infused with balsamic vinegar and herbs, or use for bruschetta topped with seasonal vegetables.
Cheese Board Companion: The bread’s mild tang and open crumb structure make it ideal for pairing with soft cheeses, charcuterie, and preserves.
Common Mistakes to Avoid
Over-flouring during shaping: Excessive flour creates a barrier that prevents proper crust formation. Use just enough to prevent sticking.
Inadequate fermentation time: Rushing the first rise results in dense, flavorless bread. Trust the process – longer fermentation equals better flavor.
Skipping the preheat: A cold Dutch oven won’t create the steam necessary for proper crust development. Always preheat for at least 30 minutes.
Opening the oven door: Resist the urge to peek during the first 30 minutes of baking, as this releases crucial steam.
Cutting too early: Allow bread to cool for at least 1 hour before slicing. The interior continues cooking from residual heat during this time.
Storing Tips for the Recipe
Short-term storage: Keep bread cut-side down on a cutting board for up to 2 days, covering with a kitchen towel to maintain crust texture while preventing staleness.
Medium-term storage: Wrap in a paper bag inside a plastic bag for up to 5 days. This method balances moisture retention with crust preservation.
Freezing method: Slice the completely cooled loaf and freeze individual slices in freezer bags for up to 3 months. Toast directly from frozen for fresh-baked taste.
Reviving day-old bread: Sprinkle the crust lightly with water and warm in a 350°F oven for 5-10 minutes to restore crispness.
Summary
This artisan bread recipe proves that bakery-quality results don’t require professional training or specialized equipment. With just five ingredients and minimal hands-on time, you can create crusty, flavorful loaves that surpass store-bought alternatives. The key lies in patience – allowing time for natural fermentation to develop complex flavors and perfect texture.
Ready to transform your kitchen into an artisanal bakery? Start your dough tonight and wake up to the intoxicating aroma of homemade bread tomorrow. Share your results in the comments below, and don’t forget to explore our collection of soup recipes that pair perfectly with fresh bread!
FAQs
Q: Can I make this recipe without a Dutch oven?
A: Yes! Use any heavy, oven-safe pot with a tight-fitting lid, or place a metal pan on the oven floor and spray the walls with water when you put the bread in to create steam.
Q: Why is my bread dense instead of airy?
A: Dense bread usually results from insufficient fermentation time, old yeast, or too much flour. Ensure your yeast is fresh and allow the full fermentation time even if it means waiting longer.
Q: Can I add ingredients like herbs or cheese?
A: Absolutely! Add up to ¼ cup of mix-ins like dried herbs, grated cheese, or chopped olives during the initial mixing phase. Avoid wet ingredients that could affect dough hydration.
Q: How do I know if my yeast is still active?
A: Test yeast by mixing ¼ teaspoon with 1 tablespoon warm water and a pinch of sugar. It should foam within 5-10 minutes. If not, replace with fresh yeast.
Q: Can I speed up the fermentation process?
A: While you can place dough in a slightly warm environment (80-85°F) to reduce fermentation time to 8-10 hours, slower fermentation develops better flavor. Patience truly pays off with this recipe.